End of School: Design a Memory Catcher
Wow, little monsters! Can you believe we're already waving goodbye to another amazing school year? It feels like just yesterday we were sharpening our pencils and dreaming up new adventures! With all the fun, learning, and new friends, there are so many happy memories floating around, right?
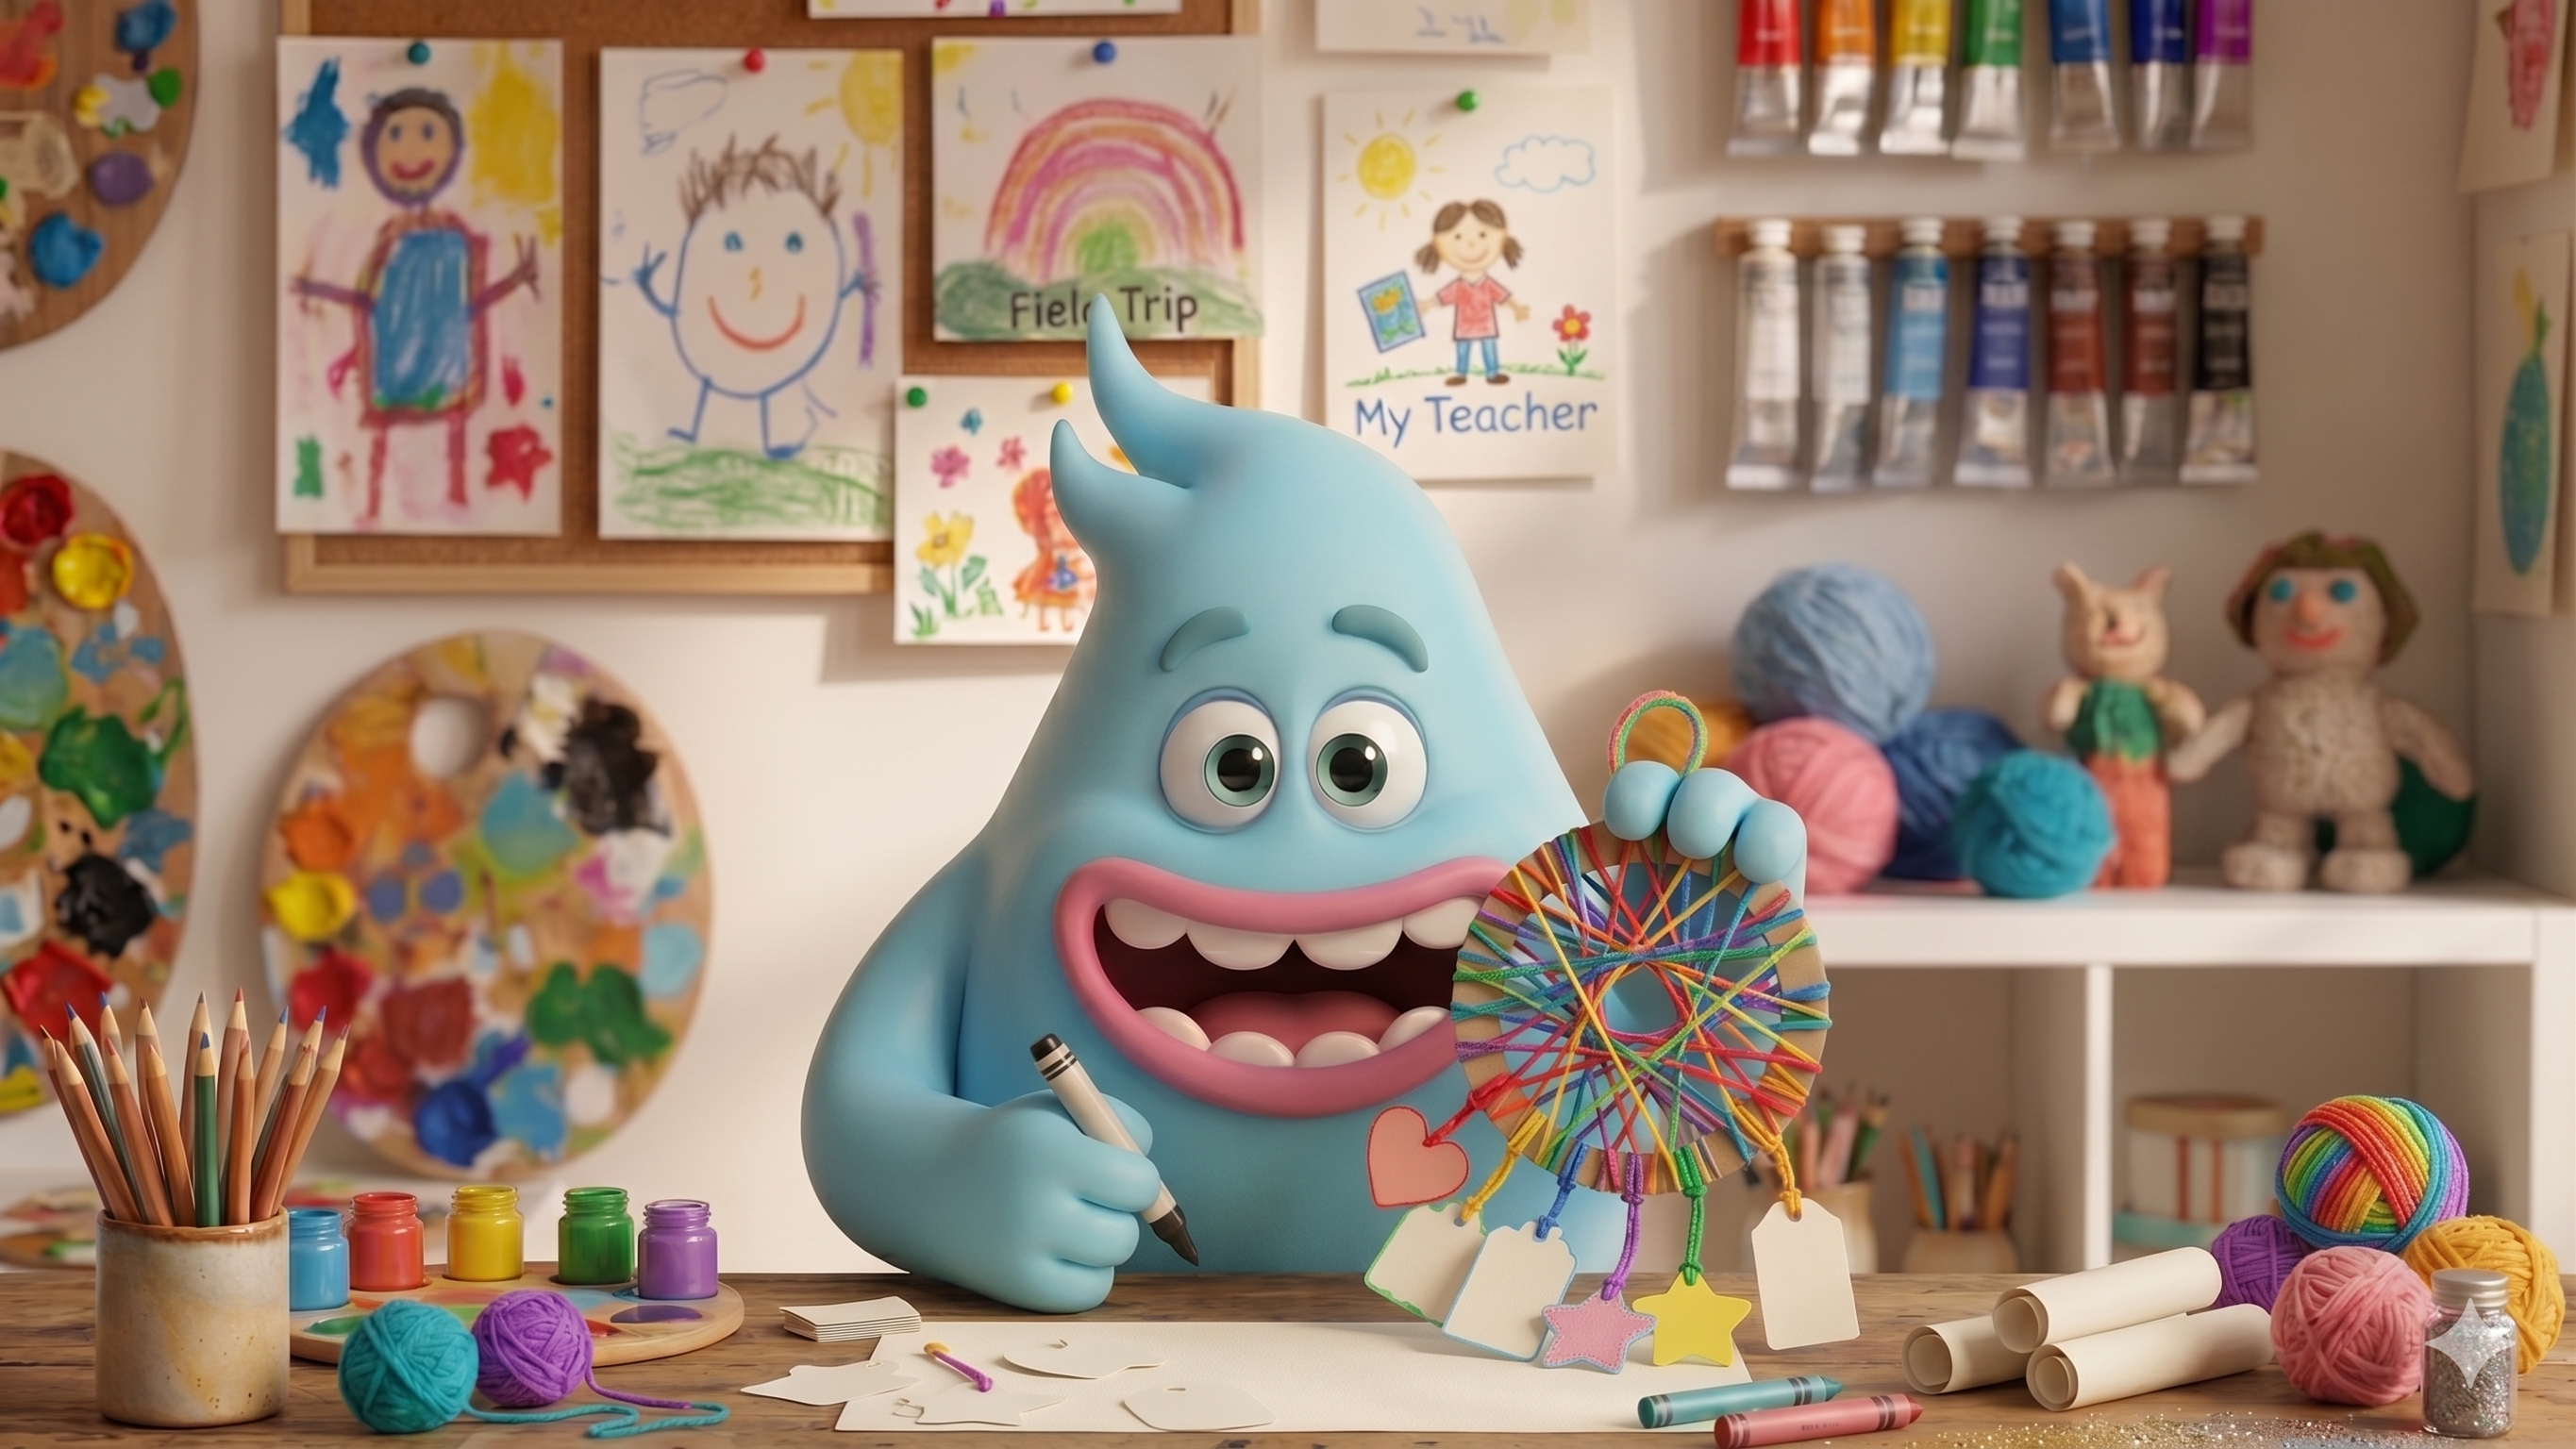
Before we jump into summer fun, let's create something super special to hold onto those precious school year memories. Today, we're going to make a "Memory Catcher"! It's like a dream catcher, but instead of catching dreams, it catches all your favorite school moments so you can look back and smile whenever you want! It's a wonderful way to celebrate everything awesome that happened, and maybe even hang it up in your room as a reminder of a great year.
Materials Needed
Fig loves finding cool things to craft with, and for our Memory Catcher, you'll need a few bits and bobs:
- Cardboard: A piece of thick cardboard (like from a cereal box or delivery package). About 8x8 inches (20x20 cm) or larger.
- Scissors: Kid-safe scissors for cutting cardboard and paper.
- Yarn or String: Colorful yarn, wool, or sturdy string in various colors. About 10-15 feet (3-5 meters) total.
- Paper: Construction paper, colored paper, old magazine pages, or even plain white paper for drawing.
- Hole Puncher: To make holes easily. If you don't have one, an adult can help you poke holes carefully with a pencil tip.
- Glue Stick or Liquid Glue: For attaching decorations.
- Decorations (optional, but super fun!): Markers, crayons, glitter, stickers, small beads, googly eyes, fabric scraps, small nature items (like dried leaves or tiny twigs).
- Pencil: For tracing and writing.
Step-by-Step Instructions
Ready to get your paws creative? Follow these steps with me to create your very own Memory Catcher!
-
Create Your Catcher Base:
- Grab your cardboard. Ask a grown-up to help you draw a large circle on it. You can trace around a dinner plate or a large bowl.
- Carefully cut out your cardboard circle. This will be the sturdy ring for your Memory Catcher!
- Next, use your hole puncher to make holes evenly spaced all around the edge of your cardboard circle. Aim for about 10-15 holes, leaving a little space between each one.
-
Wrap It Up!:
- Take your first piece of yarn or string (about 3-4 feet long). Tie one end to one of the holes on your cardboard ring. Make a good knot so it's secure!
- Now, start wrapping the yarn around your cardboard ring. Go over the cardboard, then through a hole, then over the cardboard again, making sure to cover all the plain cardboard with colorful yarn. You can wrap it neatly or in a wild, criss-cross pattern – it's your monster masterpiece!
- When you run out of yarn, tie it off securely and start with a new color if you like! Cover the entire ring with yarn.
-
Make Your Memory Tags:
- Now for the most important part: the memories! Take your construction paper, colored paper, or magazine pages.
- Cut out lots of different shapes – squares, rectangles, circles, stars, hearts, or even little monster shapes! These will be your "memory tags." Make them small enough to hang but big enough to write or draw on (about 2-3 inches).
- On each tag, write or draw one of your favorite memories from the school year. Did you ace a big test? Make a new friend? Have a super fun recess game? Create an awesome art project? Draw a picture of your favorite teacher or a funny moment!
-
Punch and Decorate Your Tags:
- Use your hole puncher to make one hole at the top of each memory tag.
- Time to make your tags extra special! Decorate them with markers, glitter, stickers, or tiny drawings. Let your inner creative monster shine!
-
String Your Memories On!:
- Cut several pieces of yarn or string, each about 6-12 inches long (make them different lengths for a cool look!).
- Tie one end of a string to the hole on a memory tag.
- Tie the other end of that string to one of the holes on your wrapped cardboard ring.
- Repeat this for all your memory tags until your Memory Catcher is full of dangling, wonderful memories!
-
Add a Hanger:
- Cut one more piece of yarn or string, about 10-15 inches long.
- Tie each end to two holes at the top of your Memory Catcher ring, opposite each other. This will create a loop so you can hang your amazing creation!
-
Final Flourishes (Optional):
- Want to add more sparkle? Glue on some beads, googly eyes, or glitter to your ring. You can even tie a few extra pieces of plain yarn or ribbon from the bottom holes of your ring for an extra swishy look!
And there you have it, little monsters! Your very own Memory Catcher, bursting with all the happy moments from your school year. Hang it in your room and let it remind you of all the fantastic adventures you had. You've earned this summer break, and now you have a beautiful piece of art to remember your awesome year by! Roar-some job!
Ready for another adventure?
Back to Creation Station

